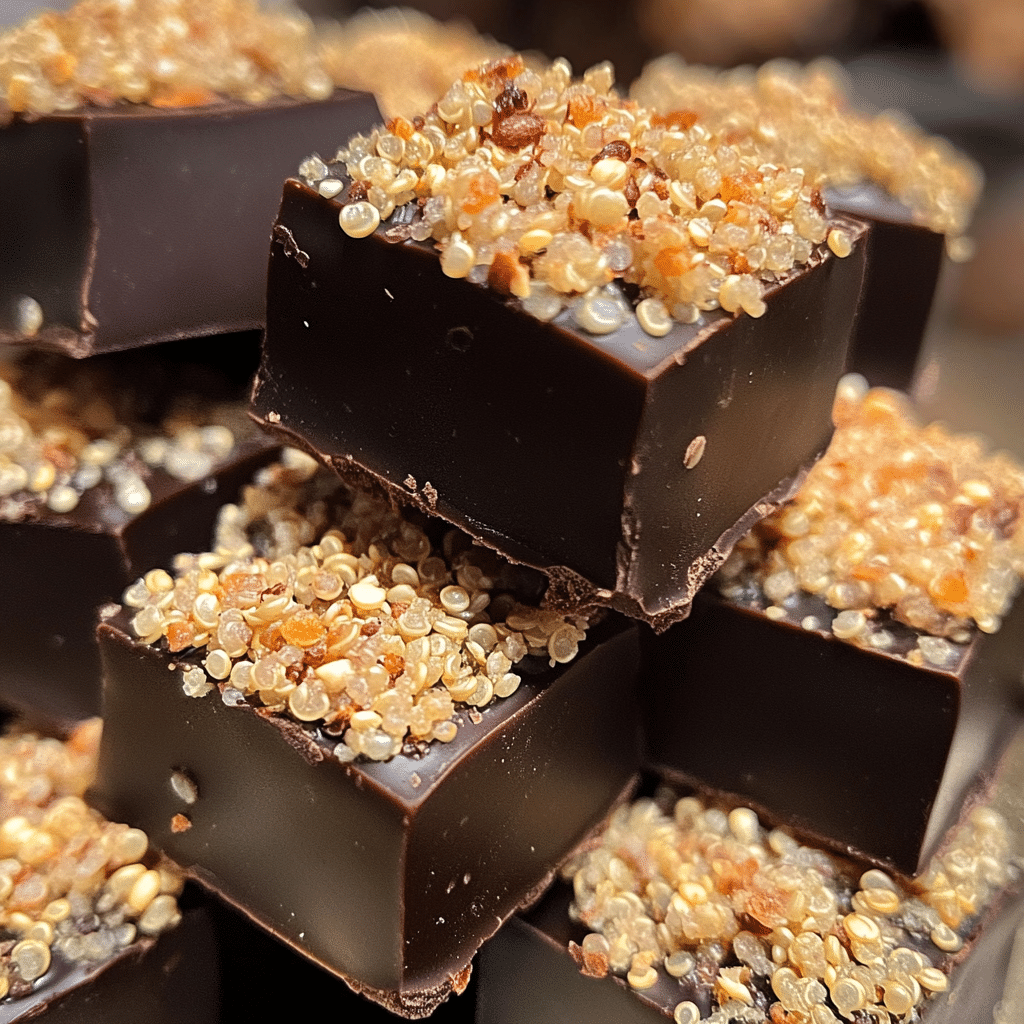
Oh my goodness, have I got a treat for you! I can’t even begin to express how many times I’ve made these No-Bake Chocolate Quinoa Crunch Clusters. Seriously, they’re a game-changer! Every single time I whip them up, my family and friends go wild over them. They’re the perfect blend of healthy and indulgent, and the best part? You can throw them together in just minutes. Trust me, these clusters are not only easy to make, but they’ll also satisfy your sweet tooth without any guilt. Ready to dive into this delicious adventure? Let’s go!
Why You’ll Love This No-Bake Chocolate Quinoa Crunch Clusters
- Quick and Easy: With minimal prep time, you can have these clusters ready in no time!
- Guilt-Free Indulgence: Satisfy your chocolate cravings while still being health-conscious.
- Versatile Treat: Perfect for snacks, desserts, or even as a post-workout boost.
- Visually Appealing: The clusters have a delightful texture and look absolutely stunning on any dessert platter.
- Make-Ahead Convenience: Prepare them in advance and enjoy them throughout the week.
The Secret to Perfect No-Bake Chocolate Quinoa Crunch Clusters
The magic behind these No-Bake Chocolate Quinoa Crunch Clusters lies in the quinoa! This mighty grain not only brings a satisfying crunch but also packs a protein punch. When you toast the quinoa, it enhances the flavor and adds a delightful nuttiness that pairs perfectly with chocolate. Trust me, toasting is key! Just a few minutes in a dry skillet can transform your clusters from good to absolutely amazing! You don’t need to be a master chef to nail this recipe; anyone can do it with a bit of patience and love.
Rave Reviews from Friends and Followers
“These clusters are the best! I can’t believe they’re healthy! My kids devour them!” – Sarah T.
“I made these for a party, and they were gone in seconds! Such a hit!” – Mike J.
“I love how quick and easy this recipe is. Perfect for my busy lifestyle!” – Emily R.
Creative Variations to Try
- Peanut Butter Chocolate Clusters: Add a swirl of creamy peanut butter for a rich, nutty flavor.
- Nut-Free Version: Swap out nuts for seeds like sunflower or pumpkin for an allergy-friendly treat.
- Fruity Twist: Toss in some dried fruits like cranberries or cherries for a sweet and tangy surprise.
- Mint Chocolate Clusters: Add a few drops of mint extract for a refreshing flavor.
- Bonus Tip: You can also drizzle melted dark chocolate on top for that extra wow factor!
FAQs – All Your Questions Answered!
Can I use different types of chocolate? Absolutely! Dark, milk, or even white chocolate can work beautifully in this recipe.
How should I store these clusters? Keep them in an airtight container in the fridge for up to a week. They can also be frozen for longer storage.
What can I substitute for quinoa? If you’re not a quinoa fan, you can use crispy brown rice or even oats for a different texture.
What if my clusters aren’t sticking together? Make sure you’re using enough chocolate to bind them. If they seem dry, add a splash of nut butter or melted coconut oil.
Can I make these clusters vegan? Yes! Just ensure you use dairy-free chocolate, and you’re all set!
Storage/Serving Tips
- Store clusters in an airtight container in the fridge for up to one week.
- For longer shelf life, freeze them in a single layer, then transfer to a freezer bag.
- Serve them chilled for a delightful crunch or at room temperature for a softer texture.
- Try serving them on a colorful platter to impress your guests!
Perfect Occasions for No-Bake Chocolate Quinoa Crunch Clusters
- After-school snacks for the kids
- Healthy additions to a lunchbox
- Potluck parties where you want to impress
- Movie nights with friends
- Post-workout energy boost
- Holiday gatherings or celebrations
The Complete Recipe
Thanks for sticking with me! Now, let’s get to the good stuff — the recipe!
No-Bake Chocolate Quinoa Crunch Clusters
Ingredients
- 1 cup cooked quinoa
- 1 cup dark chocolate chips (or your choice of chocolate)
- 1/2 cup almond butter (or any nut butter)
- 1/4 cup honey or maple syrup
- 1/2 teaspoon vanilla extract
- 1/4 teaspoon salt
- Optional: 1/4 cup chopped nuts or seeds
Tip: Make sure your quinoa is fully cooked and cooled before mixing. This will help the chocolate set properly and keep the clusters from being too gooey.
Step-by-Step Instructions
Step 1: Prepare the Quinoa
Start by rinsing your quinoa under cold water. Cook it according to package instructions, usually about 15 minutes. Once done, let it cool completely. This step is essential for achieving the right texture in your clusters!
Step 2: Melt the Chocolate
In a microwave-safe bowl, combine the chocolate chips and almond butter. Microwave in 30-second intervals, stirring in between, until the mixture is smooth and creamy. This will be the delicious glue that holds everything together!
Step 3: Mix it Up
In a large bowl, combine the cooled quinoa, melted chocolate mixture, honey or maple syrup, vanilla extract, and salt. Stir until everything is well coated. You want to see that beautiful chocolate covering all the quinoa!
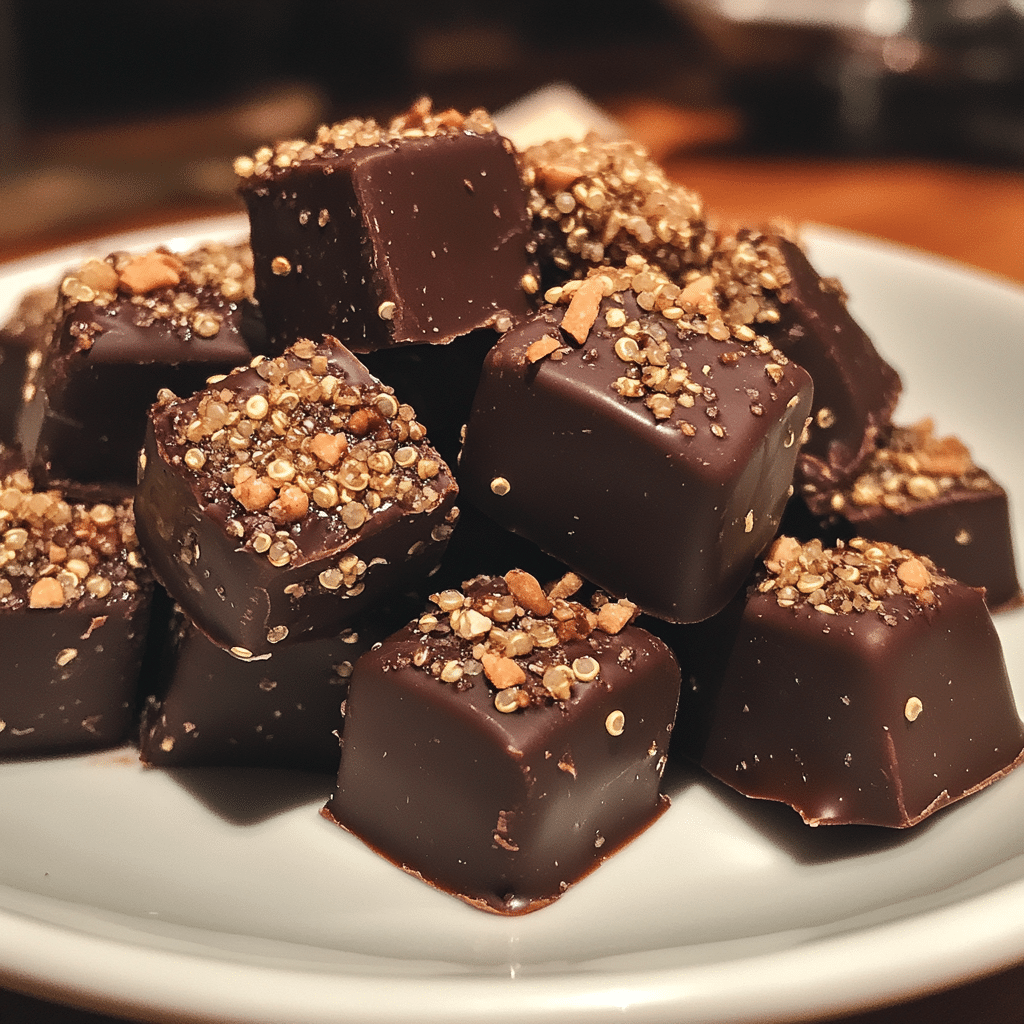
Step 4: Form the Clusters
Using a spoon or your hands, scoop out small portions of the mixture and form them into clusters on a parchment-lined baking sheet. Don’t worry about making them perfect; the rustic look adds to their charm!
Step 5: Chill to Set
Place the baking sheet in the refrigerator for at least 30 minutes, or until the clusters are firm. This step is crucial for that satisfying crunch!
Step 6: Enjoy!
Once set, you can dig in! These No-Bake Chocolate Quinoa Crunch Clusters are perfect for snacking, dessert, or even a quick energy boost. Enjoy the delightful crunch and rich chocolate flavor!
Nutritional Information (per cluster): Approximately 120 calories, 5g protein, 8g fat, and 10g carbohydrates.
Final Thoughts
I can’t recommend these No-Bake Chocolate Quinoa Crunch Clusters enough! They are not just a treat; they’re a full-on experience of flavor and texture that you have to try for yourself. Whether you’re making them for a gathering or just for yourself, they are sure to impress. So what are you waiting for? Grab your ingredients and get started on this quick, easy, and absolutely delicious recipe today!