Let me tell you about the time I whipped up a batch of these Healthy Waffles with an avocado twist, and it was nothing short of a culinary revelation! Trust me, the first time I made these, I couldn’t believe how fluffy and delicious they turned out. I’ve made this recipe at least a dozen times since then, and it has become a staple in my household. Every time I serve them, I get rave reviews from family and friends who can’t believe they are eating something so nutritious! Are you ready to transform your breakfast game and impress your loved ones? Let’s dive in!
Why You’ll Love This Healthy Waffles
- Nutritious Ingredients: Packed with the goodness of avocados, these waffles are rich in healthy fats and essential nutrients.
- Easy to Make: With just a few simple steps, you can have a batch ready in no time—perfect for busy mornings!
- Versatile Flavor: Customize these waffles with your favorite toppings or mix-ins to suit any palate.
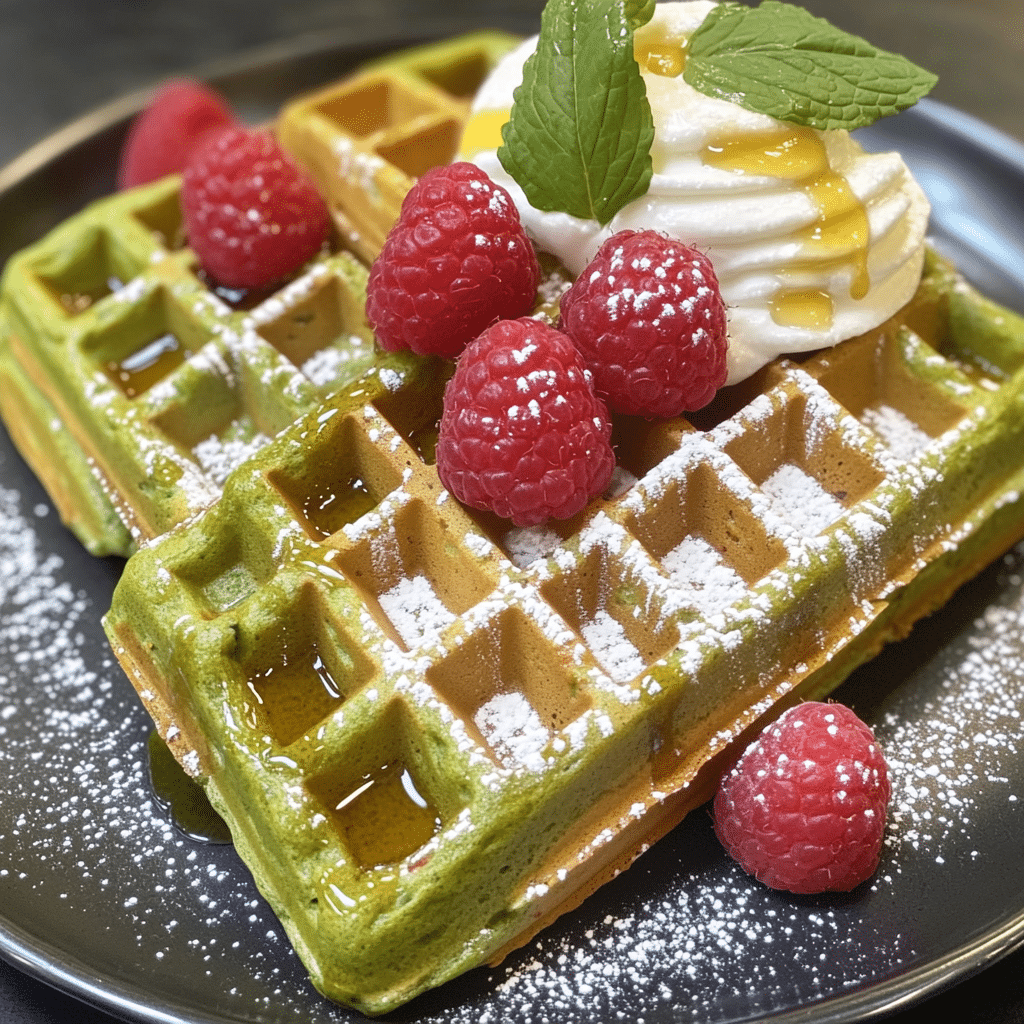
- Visually Stunning: The vibrant green from the avocado makes these waffles not just tasty, but Instagram-worthy too!
- Make-Ahead Convenience: You can easily prepare the batter in advance or freeze the waffles for a quick breakfast option later.
The Secret to Perfect Healthy Waffles
The secret behind these Healthy Waffles lies in the perfect balance of ripe avocado and whole-grain flour. The avocado not only provides that creamy texture but also adds a subtle flavor that pairs beautifully with the other ingredients. I’ve found that using a ripe avocado is key; it should be soft enough to mash easily, but not overripe. Trust me, this little detail will make a huge difference in the final result! To ensure your waffles are perfectly fluffy, make sure you don’t overmix the batter—just stir until the ingredients are combined, and then stop. This will help keep them light and airy!
Rave Reviews from Friends and Followers
“I can’t believe these Healthy Waffles are made with avocado! They taste incredible and have become my go-to breakfast!” – Sarah T.
“I was skeptical at first, but these waffles are a game-changer! They’re so fluffy and delicious, and my kids love them!” – Mark L.
“These Healthy Waffles are the perfect way to start the day. They are nutritious and filling without being heavy!” – Jessica W.
Creative Variations to Try
- Chocolate Chip Avocado Waffles: Add a handful of dark chocolate chips to the batter for a sweet twist.
- Banana Walnut Waffles: Mash in a ripe banana and sprinkle chopped walnuts for extra flavor and crunch.
- Blueberry Avocado Waffles: Toss in fresh or frozen blueberries for a burst of juicy goodness with every bite.
- Matcha Avocado Waffles: Mix in a teaspoon of matcha powder for a vibrant green color and an antioxidant boost.
- Spiced Cinnamon Waffles: Add a dash of cinnamon and nutmeg to the batter for a warm, cozy flavor.
Bonus: Experiment with different types of flour, like almond or oat flour, for unique flavors and textures!
FAQs – All Your Questions Answered!
Can I use a different type of flour? Yes! Whole wheat, almond, or oat flour all work well. Just remember that each type may change the texture slightly.
How do I store leftover waffles? Store them in an airtight container in the refrigerator for up to 3 days, or freeze them for up to 2 months.
Can I make the batter ahead of time? Absolutely! You can prepare the batter the night before and keep it in the fridge. Just give it a gentle stir before cooking.
What can I serve with these waffles? Top them with fresh fruit, yogurt, maple syrup, or nut butter for a delicious finishing touch!
Why do my waffles stick to the iron? Make sure your waffle iron is well-greased before pouring in the batter. If sticking persists, consider using a non-stick spray.
Storage/Serving Tips
- Store leftover waffles in an airtight container in the fridge for up to 3 days.
- For longer storage, freeze waffles between layers of parchment paper in a freezer-safe bag for up to 2 months.
- Reheat waffles in the toaster for a quick and crispy treat!
- Serve these Healthy Waffles with a dollop of Greek yogurt and fresh berries for a wholesome meal.
Perfect Occasions for Healthy Waffles
- Weekend brunch with friends
- Family breakfast gatherings
- Post-workout refuel
- Holiday morning celebrations
- Cozy breakfast-for-dinner nights
- Surprise treats for loved ones
The Complete Recipe
Thanks for sticking around! Now, let’s get to the good stuff—the actual recipe for these mouthwatering Healthy Waffles!
Healthy Waffles

Ingredients
- 1 ripe avocado
- 1 cup whole grain flour
- 1 tablespoon baking powder
- 1 tablespoon honey or maple syrup
- 1 cup almond milk (or any milk of your choice)
- 1 teaspoon vanilla extract
- 1/2 teaspoon salt
- Optional: 1/2 cup chocolate chips or fruit of choice
Tip: Make sure your avocado is ripe—it should yield slightly to pressure. This ensures a creamy texture in your waffles.
Extend ingredients section: You can substitute almond milk with oat milk or regular cow’s milk. For a gluten-free option, use a gluten-free flour blend. Each ingredient plays a role; for instance, the baking powder is crucial for that fluffy rise while the avocado adds moisture and healthy fats!
Step-by-Step Instructions
Step 1: Prepare Your Ingredients
Start by gathering all your ingredients. It’s always easier to have everything ready to go. Mash the ripe avocado in a bowl until it’s creamy and smooth. This will be the base of your batter, giving it that unique twist!
Step 2: Mix the Wet Ingredients
In a separate bowl, combine the almond milk, honey (or maple syrup), and vanilla extract. Whisk these together until they’re well blended. Then, fold in the mashed avocado until the mixture is smooth. This is where the magic begins to happen!
Step 3: Combine Dry Ingredients
In another bowl, whisk together the whole grain flour, baking powder, and salt. This step ensures that the baking powder is evenly distributed, which is crucial for those fluffy waffles.
Step 4: Mix Wet and Dry Ingredients
Now, pour the wet ingredients into the dry ingredients. Gently stir until just combined; don’t overmix! You want to keep the batter light and airy. If you’re adding any optional ingredients like chocolate chips or fruit, fold them in at this stage.
Step 5: Preheat Your Waffle Iron
While you let the batter rest for a few minutes, preheat your waffle iron according to the manufacturer’s instructions. A properly heated waffle iron is essential for that perfect crispy exterior.
Step 6: Cook the Waffles
Lightly grease the waffle iron with cooking spray or a brush of oil. Pour in the batter according to your iron’s capacity, close the lid, and cook until golden brown. This usually takes about 4-5 minutes, but keep an eye on them. The smell alone will have you drooling!
Step 7: Serve and Enjoy!
Once cooked, carefully remove the waffles and serve them immediately with your favorite toppings. I love fresh berries and a drizzle of maple syrup, but feel free to get