Hey there, snack lovers! If you’re anything like me, you know how important it is to have tasty yet healthy snacks on hand. I can’t even count how many times I’ve whipped up a batch of these delightful homemade protein balls, and let me tell you, they are a total game-changer! Whether I’m rushing out the door for work or enjoying a quiet afternoon at home, these little bites of goodness have become my go-to treat. Trust me, once you try this easy homemade protein balls recipe, you’ll be hooked just like I am!
Why You’ll Love This Easy Homemade Protein Balls Recipe
- Super Easy to Make: You can whip these up in just 15 minutes, no baking required!
- Endless Customization: Mix and match ingredients to suit your taste or dietary needs.
- Deliciously Nutritious: Packed with protein, fiber, and healthy fats to keep you satisfied.
- Perfect for Meal Prep: Make a big batch and store them for quick snacks all week long.
- Great for Any Occasion: Whether it’s a post-workout boost or a sweet treat, they fit right in!
The Secret to Perfect Protein Balls
The secret to making these protein balls not only easy but also incredibly delicious lies in the balance of ingredients. The combination of oats, nut butter, and a sweetener like honey or maple syrup creates a perfect texture that holds together beautifully. I’ve found that using a food processor makes the process even simpler—just pulse the ingredients until they’re well combined. And here’s a pro tip: let the mixture chill in the fridge for about 30 minutes before rolling them into balls. This helps them firm up and makes them easier to handle. Trust me, you’ll be amazed at how simple it is to create these tasty treats!
Rave Reviews from Friends and Followers
“These protein balls are a lifesaver! I can’t believe how easy they are to make, and they taste fantastic. My kids love them too!” — Sarah J.
“I’m not usually a fan of healthy snacks, but these protein balls changed my mind! They’re perfect for my afternoon cravings.” — Mike T.
“I made a batch for my workout group, and they vanished in minutes! Everyone was asking for the recipe!” — Lisa R.
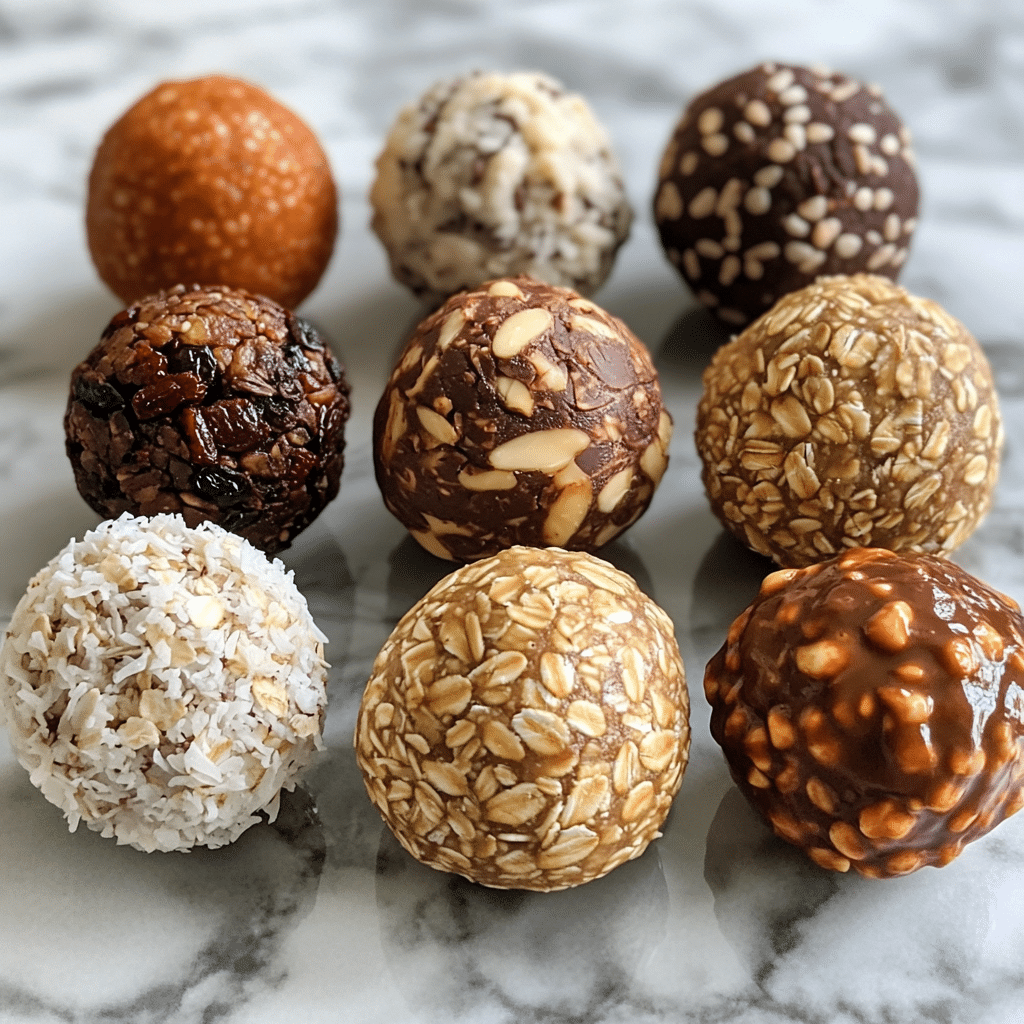
Creative Variations to Try
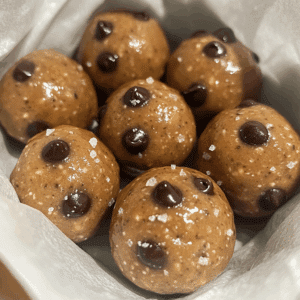
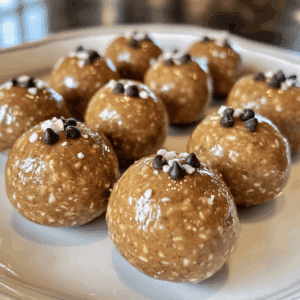
- Chocolate Chip Peanut Butter: Add mini chocolate chips for a sweet twist.
- Coconut Almond Joy: Mix in shredded coconut and chopped almonds for a tropical flavor.
- Matcha Green Tea: Incorporate matcha powder for a unique energy boost.
- Spiced Pumpkin: Add pumpkin puree and spices for a seasonal treat.
Bonus: Don’t forget to experiment with different nut butters—hazelnut, almond, or even sunflower seed butter for a nut-free option!
FAQs – All Your Questions Answered!
What can I substitute for nut butter? You can use sunbutter, tahini, or even yogurt for a different flavor profile.
How long do protein balls last? They can be stored in the fridge for up to a week or frozen for up to three months.
Can I omit the sweetener? While you can reduce it, the sweetener helps with binding and flavor, so I recommend keeping at least a little.
Why are my protein balls too crumbly? This usually happens if there’s not enough moisture. Try adding a bit more nut butter or a splash of milk.
Storage/Serving Tips
- Store in an airtight container in the fridge for optimal freshness.
- For longer storage, freeze them in a single layer before transferring to a freezer bag.
- Serve them chilled or at room temperature for the best flavor!
Perfect Occasions for Homemade Protein Balls
- Post-workout recovery snack
- Quick breakfast on busy mornings
- Afternoon pick-me-up at the office
- Healthy treat for kids’ lunchboxes
- Party snack for gatherings or events
The Complete Recipe
Thank you for sticking around! Now, let’s get into the nitty-gritty of making these delicious protein balls.
Homemade Protein Balls
Ingredients
- 1 cup rolled oats
- 1/2 cup nut butter (peanut, almond, or sunflower seed)
- 1/3 cup honey or maple syrup
- 1/4 cup protein powder (optional)
- 1/2 cup mix-ins (chocolate chips, dried fruit, nuts, etc.)
Tip: Feel free to swap out the nut butter or sweeteners based on your dietary preferences—this recipe is designed to be versatile!
Extend ingredients section: Consider adding chia seeds for extra fiber, or use agave nectar instead of honey for a vegan option. Each ingredient plays a role in the texture and flavor, so choose what suits your taste!
Step-by-Step Instructions
Step 1: Combine Dry Ingredients
In a large bowl, mix the rolled oats, protein powder, and any dry mix-ins. This step ensures that everything is evenly distributed, so you get a little bit of everything in each ball!
Step 2: Add Wet Ingredients
Pour in the nut butter and honey (or maple syrup). Use a spatula to combine everything until it forms a sticky mixture. If it feels too dry, add a splash of milk or extra nut butter to achieve the right consistency.
Step 3: Mix-In the Goodies
Now is the time to fold in your favorite mix-ins—this is where you can get creative! Whether it’s chocolate chips or dried cranberries, make sure they are evenly distributed throughout the mixture.
Step 4: Chill the Mixture
Cover the bowl with plastic wrap and place it in the fridge for about 30 minutes. This helps the mixture firm up, making it easier to roll into balls.
Step 5: Roll into Balls
Once chilled, use your hands to roll the mixture into balls, about 1 inch in diameter. If you find that the mixture is still too sticky, dampen your hands slightly to help prevent sticking.
Step 6: Store and Enjoy!
Place the protein balls in an airtight container. Refrigerate or freeze as desired. Enjoy them as a quick snack or a post-workout treat!
Nutrition Info: Each protein ball contains approximately 100 calories, 5g protein, 3g fiber, and 5g healthy fats, depending on the ingredients you choose.
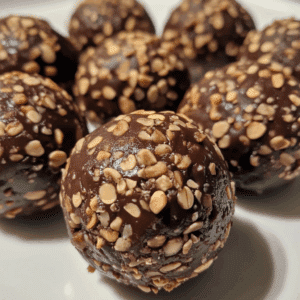
Extend instructions: If you’re feeling fancy, you can roll your protein balls in shredded coconut or chopped nuts for an extra touch. Presentation matters, especially when sharing with friends!
Final Thoughts
So there you have it, my friends! This easy homemade protein balls recipe is not only delicious but also incredibly versatile and healthy. I can’t recommend making these enough—they truly are a snack game-changer! I encourage you to try this recipe and make it your own. With a little creativity, you can enjoy a guilt-free treat any time you need a little pick-me-up. Happy snacking!