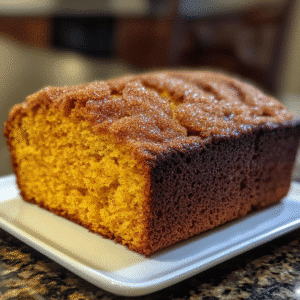
Let me tell you about one of my absolute favorite fall recipes: Pumpkin-Shaped Bread! I first made this delightful treat a few years ago for a cozy gathering with friends, and it was an instant hit. I can still remember the warm, inviting aroma wafting through my kitchen as it baked — it was like a warm hug from autumn itself! Since then, I’ve made it countless times, and every single time, my friends and family rave about it. Trust me, if you want to impress your loved ones and fill your home with the essence of fall, this is the recipe you need!
Why You’ll Love This Pumpkin-Shaped Bread
- Easy to Make: Even if you’re a beginner in the kitchen, you’ll find this recipe simple and approachable.
- Versatile: You can enjoy it fresh out of the oven, toasted, or as a base for delicious sandwiches.
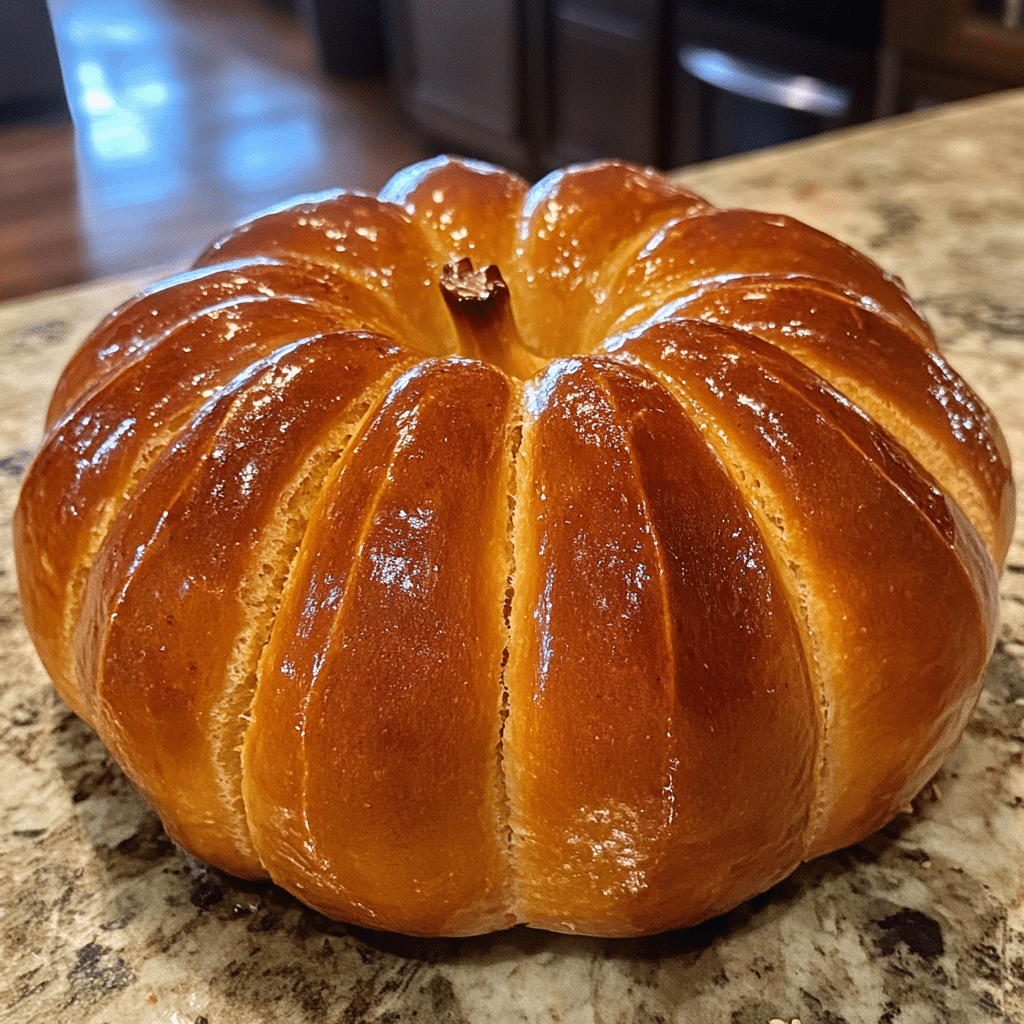
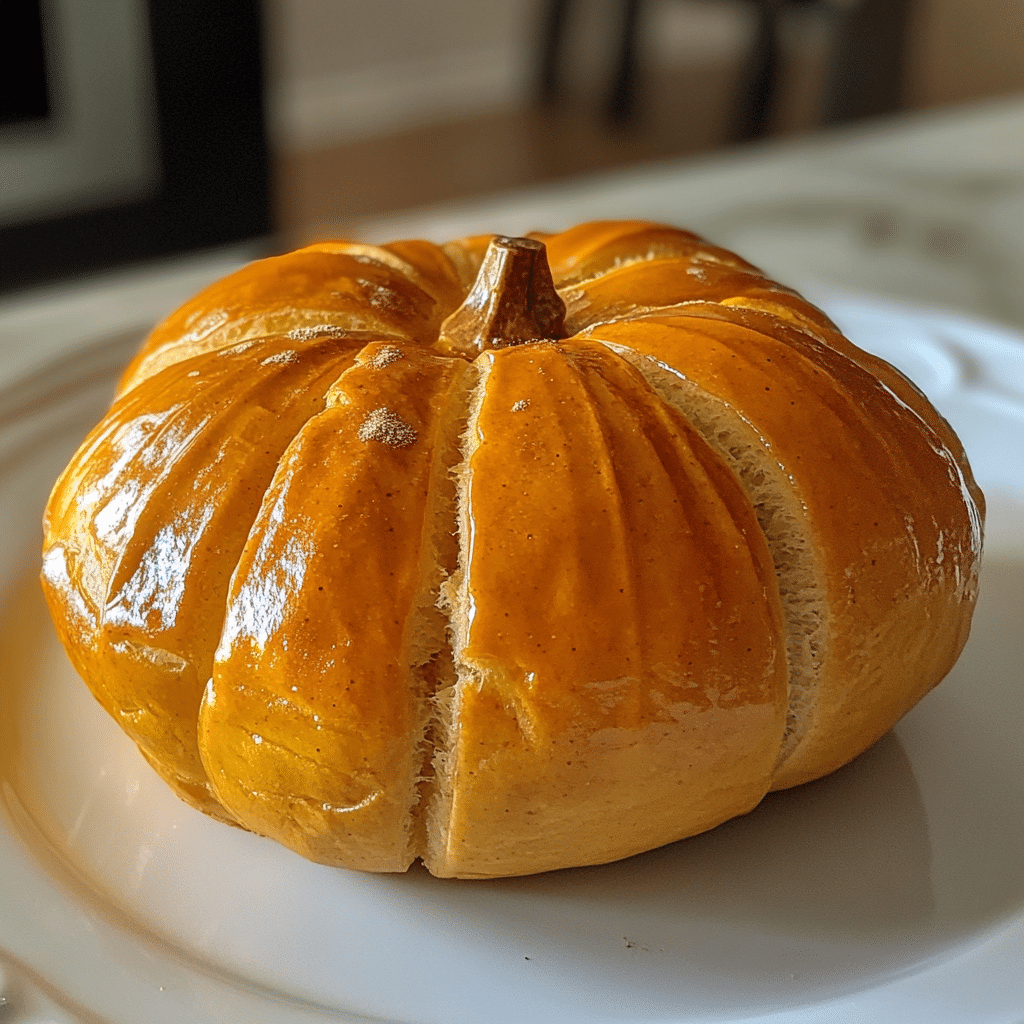
- Visually Stunning: The unique pumpkin shape is a showstopper perfect for any gathering.
- Deliciously Flavorful: With a hint of cinnamon and nutmeg, each bite is like a taste of fall.
- Make-Ahead Convenience: You can prepare the dough in advance, making it easier to enjoy fresh bread anytime.
The Secret to Perfect Pumpkin-Shaped Bread
The secret to achieving that perfect pumpkin-shaped bread lies in the dough itself! Using a combination of bread flour and all-purpose flour gives it the right structure and chewiness. And here’s my insider tip: don’t rush the rising process. Allowing the dough to rise until it has doubled in size ensures a light, airy texture that will have everyone coming back for seconds (or thirds!). Trust me, patience truly pays off in this recipe!
Rave Reviews from Friends and Followers
“This pumpkin-shaped bread was the highlight of our fall dinner! It tasted incredible and looked so beautiful on the table.” – Sarah H.
“I made this for a family gathering, and everyone was amazed! The flavors are so comforting, and the shape is just perfect.” – Mike T.
“I can’t believe how easy this was to make! I’ll definitely be making it again for Thanksgiving.” – Jessica L.
Creative Variations to Try
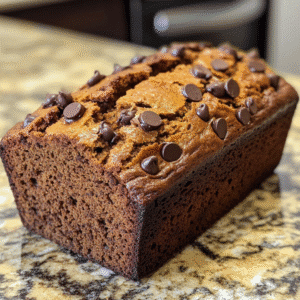
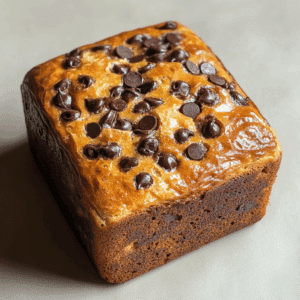
- Chocolate Chip Pumpkin Bread: Fold in some chocolate chips for a sweet twist that kids will adore.
- Cranberry Orange Pumpkin Bread: Add dried cranberries and orange zest for a bright flavor contrast.
- Herb-Infused Pumpkin Bread: Mix in some fresh herbs like rosemary or thyme for a savory version.
- Pumpkin Spice Swirl: Create a cinnamon-sugar swirl for a delightful surprise in each slice.
Bonus: Consider using a pumpkin-shaped cookie cutter to create mini bread rolls for a fun twist at your next gathering!
FAQs – All Your Questions Answered!
Can I use canned pumpkin instead of fresh? Yes! Just make sure to use pure pumpkin puree, not pumpkin pie filling.
How do I store leftover pumpkin-shaped bread? Store it in an airtight container at room temperature for up to 3 days, or refrigerate for up to a week.
Can I freeze the bread? Absolutely! Wrap it tightly in plastic wrap and foil, and it will keep well in the freezer for up to 3 months.
What should I do if my dough isn’t rising? Ensure your yeast is fresh and that your environment is warm. You can place the dough in a slightly warm oven to help it rise.
Storage/Serving Tips
- Store your pumpkin-shaped bread in an airtight container to keep it fresh.
- To enjoy it toasted, slice it and pop it in the toaster for a few minutes.
- This bread pairs beautifully with butter, honey, or your favorite spread!
Perfect Occasions for Pumpkin-Shaped Bread
- Thanksgiving dinner — a perfect centerpiece for your feast!
- Fall-themed parties or gatherings with friends.
- Cozy family breakfasts on chilly mornings.
- Harvest festivals or potluck events.
- As a delightful gift for neighbors or friends to share the autumn spirit.
The Complete Recipe
Thanks for sticking with me! Now, let’s get to the good part — the recipe!
Pumpkin-Shaped Bread
Ingredients
- 3 ½ cups bread flour
- 1 ½ cups all-purpose flour
- 1 packet (2 ¼ tsp) active dry yeast
- 1 cup warm milk (110°F)
- ½ cup pumpkin puree
- ¼ cup sugar
- ½ cup unsalted butter, softened
- 2 large eggs
- 1 tsp salt
- 1 tsp ground cinnamon
- ½ tsp ground nutmeg
Tip: For extra flavor, add a pinch of ginger or cloves — they complement the pumpkin beautifully!
Extend ingredients section: Consider adding nuts or seeds for texture. Sunflower seeds or walnuts can add a delightful crunch and flavor. If you want to make it dairy-free, substitute the milk with almond or coconut milk.
Step-by-Step Instructions
Step 1: Activate the Yeast
In a small bowl, combine the warm milk and sugar. Sprinkle the yeast on top and let it sit for about 5-10 minutes until bubbly. This step is crucial; it ensures your dough rises beautifully!
Step 2: Mix the Dough
In a large mixing bowl, combine the bread flour, all-purpose flour, salt, cinnamon, and nutmeg. Add the pumpkin puree, softened butter, and eggs. Pour in the activated yeast mixture and stir until the dough starts to come together. It’s going to be a bit sticky, but that’s okay!
Step 3: Knead to Perfection
Transfer the dough to a floured surface and knead for about 5-7 minutes until it’s smooth and elastic. This step develops the gluten, giving your bread that perfect chew. If the dough sticks, sprinkle a little more flour as needed.
Step 4: First Rise
Place the dough in a greased bowl, cover it with a damp cloth, and let it rise in a warm place for about 1-2 hours, or until it has doubled in size. This is where the magic happens!
Step 5: Shape the Bread
Once risen, punch down the dough to release the air. Divide the dough into smaller pieces to form the pumpkin shape. Roll out a large ball for the body and smaller ones for the stem. Use your fingers to create grooves for that pumpkin look!
Step 6: Second Rise
Place the shaped dough on a baking sheet lined with parchment paper. Cover it again and let it rise for another 30-45 minutes. Preheat your oven to 350°F while you wait; the smell is going to be incredible!
Step 7: Bake to Golden Perfection
Bake the bread for 25-30 minutes, or until it’s golden brown and sounds hollow when tapped. The aroma will fill your kitchen, and you’ll be counting down the minutes until you can slice into it!
Step 8: Cool and Serve
Let the bread cool on a wire rack before slicing. This helps it set perfectly. You’ll want to enjoy it warm, slathered with butter or your favorite spread!
Nutrition info (per slice): Approximately 150 calories, 4g protein, 2g fiber.
Extend instructions: For a show-stopping presentation, use a leaf cutter to create decorative leaves from the dough and place them