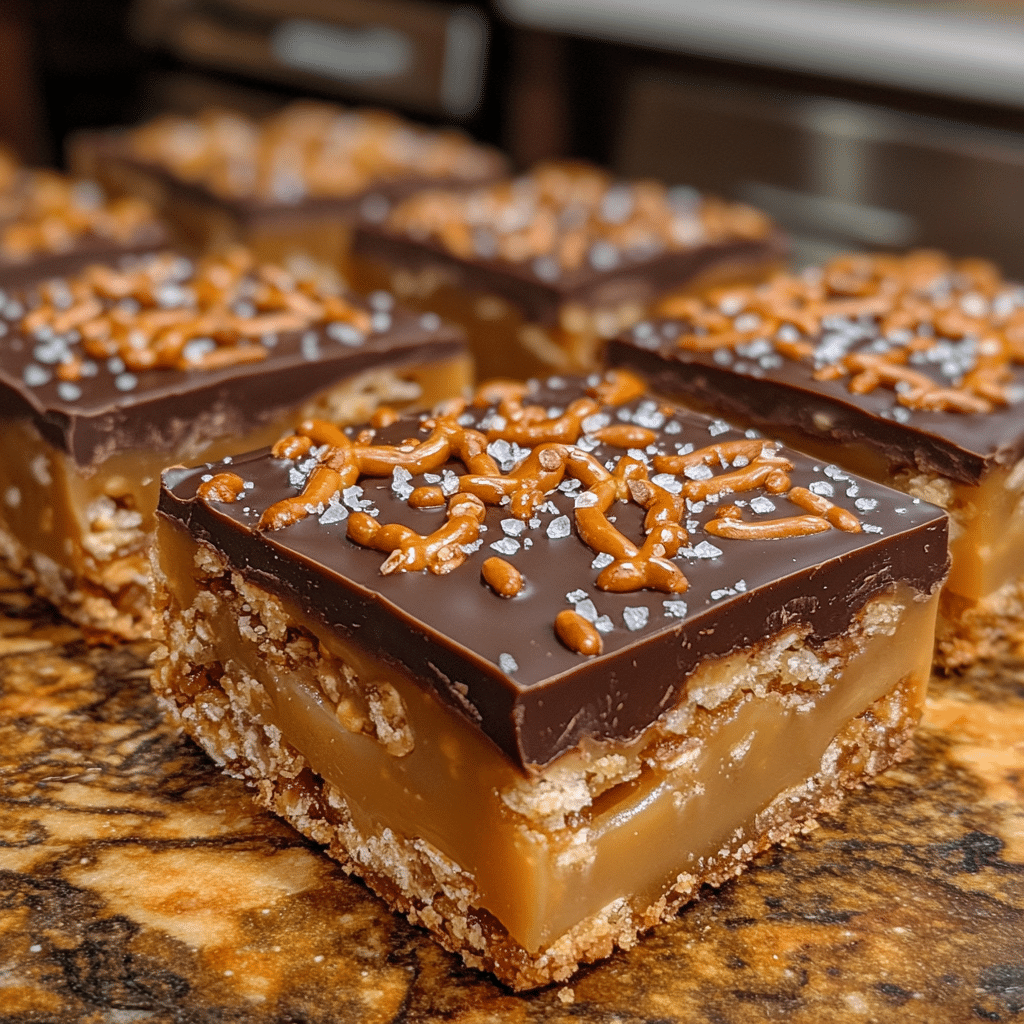
Let me tell you about my absolute favorite sweet treat: No-Bake Salted Caramel Pretzel Bars! Trust me when I say that I’ve made this recipe more times than I can count, and it never fails to impress. The perfect combination of sweet and salty, these bars have become a staple at every gathering I host. Friends and family rave about them, and I can’t help but feel like a superstar baker every time I whip them up. If you’re looking for a dessert that’s sure to win hearts, you’ve come to the right place!
Why You’ll Love This No-Bake Salted Caramel Pretzel Bars Recipe
- No baking required: That’s right! You don’t have to turn on the oven, which makes this recipe a breeze.
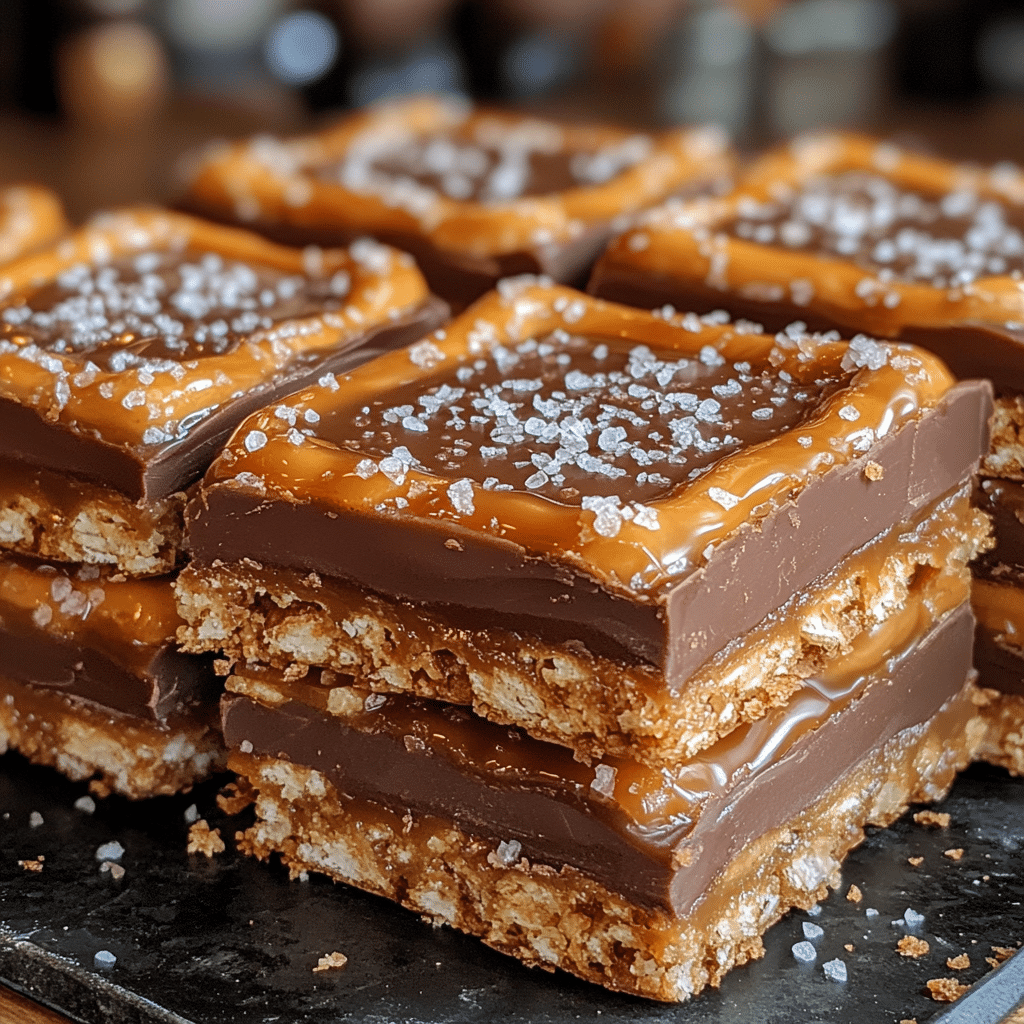
- Perfectly balanced flavors: The combination of crunchy pretzels, creamy caramel, and a sprinkle of sea salt creates a flavor explosion in every bite.
- Visually stunning: These bars are as beautiful as they are delicious, making them perfect for sharing on social media or at gatherings.
- Easy to customize: You can add your favorite ingredients or flavors to make these bars uniquely yours.
- Make-ahead convenience: These bars can be prepared ahead of time, so you’ll always be ready for unexpected guests or cravings.
The Secret to Perfect No-Bake Salted Caramel Pretzel Bars
The key to making these bars truly exceptional is in the caramel sauce. I always opt for a high-quality store-bought caramel or make my own to ensure a rich, buttery flavor that pairs wonderfully with the pretzels. When melting the caramel, take your time and stir it gently to avoid burning. Trust me, this step is crucial! Also, let the bars chill in the refrigerator for a bit longer than you think—they become even more delicious as they cool, allowing the flavors to meld together beautifully. Anyone can master this recipe with a little patience!
Rave Reviews from Friends and Followers
“These No-Bake Salted Caramel Pretzel Bars were a hit at my party! I can’t believe how easy they were to make!” – Sarah J.
“I brought these to the office, and everyone was asking for the recipe. They are so addictively good!” – Mark T.
“I’ve tried a lot of no-bake desserts, but these bars take the cake! The flavor is out of this world!” – Emily R.
Creative Variations to Try
- Chocolate Drizzle: Drizzle melted chocolate over the top for an extra layer of indulgence.
- Nutty Addition: Incorporate crushed nuts like pecans or almonds for added crunch.
- Peanut Butter Swirl: Mix creamy peanut butter into the caramel for a rich, nutty flavor.
- Seasonal Twist: Add festive spices like cinnamon or pumpkin spice during the fall for a seasonal treat.
Bonus: For a fun twist, use pretzel sticks instead of traditional pretzels for a unique presentation!
FAQs – All Your Questions Answered!
How should I store these bars? Store them in an airtight container in the refrigerator for up to a week. They also freeze well for up to a month!
Can I substitute ingredients? Absolutely! You can use gluten-free pretzels or dairy-free caramel to accommodate dietary restrictions.
What if my caramel is too thick? If your caramel thickens too much, simply add a splash of cream or milk and reheat gently until it’s pourable.
How long do these bars need to chill? I recommend chilling them for at least two hours, but for the best results, overnight is ideal!
Storage/Serving Tips
- Store in an airtight container to maintain freshness.
- For best flavor, consume within one week.
- Serve chilled for the best texture and flavor.
Perfect Occasions for No-Bake Salted Caramel Pretzel Bars
- Birthday parties – they’re a crowd-pleaser!
- Potlucks – easy to transport and share.
- Game nights – everyone loves a sweet treat while watching the big game.
- Movie nights – pair them with your favorite film for a cozy night in.
- Holiday gatherings – the perfect festive dessert!
The Complete Recipe
Thank you for sticking with me through this delicious journey! Now, let’s get to the good stuff—the recipe!
No-Bake Salted Caramel Pretzel Bars
Ingredients
- 2 cups crushed pretzels
- 1 cup granulated sugar
- 1 cup unsalted butter
- 1 cup caramel sauce (store-bought or homemade)
- 1/2 cup chocolate chips (optional)
- Sea salt for sprinkling
Tip: For a richer flavor, use brown sugar instead of granulated sugar in the caramel sauce. This will give your bars a deeper, more complex taste.
Step-by-Step Instructions
Step 1: Prepare Your Pan
Start by lining an 8×8 inch square baking dish with parchment paper, leaving some overhang on the sides. This will help you lift the bars out easily later. Grease the parchment lightly for extra insurance against sticking.
Step 2: Make the Pretzel Base
In a large bowl, combine the crushed pretzels and melted butter. Stir until all the pretzels are well coated. Press this mixture firmly into the bottom of the prepared pan. This will be the delicious crunchy base of your bars!
Step 3: Prepare the Caramel
If you’re making homemade caramel, combine sugar and butter in a saucepan over medium heat. Stir continuously until it melts and bubbles. Once it reaches a golden color, remove from heat and let cool slightly. Pour it over the pretzel base, spreading it evenly.
Step 4: Chill Out
Refrigerate the mixture for about 2 hours or until set. If you have the time, letting it chill overnight will enhance the flavors even more!
Step 5: Finish with Chocolate and Sea Salt
If you’re using chocolate chips, melt them in the microwave or on a double boiler. Drizzle the melted chocolate over the top of the caramel layer. Sprinkle lightly with sea salt to finish. Cut into bars once set!
These No-Bake Salted Caramel Pretzel Bars have approximately 200 calories per bar, depending on the size you cut them. They’re a delightful treat with a wonderful balance of flavors and textures.
Final Thoughts
There you have it! This No-Bake Salted Caramel Pretzel Bars recipe is a total game-changer. The combination of salty pretzels and sweet caramel will have everyone coming back for seconds (and thirds!). I can’t recommend this recipe enough—it’s not just a dessert; it’s a way to create delicious memories. So grab your ingredients, get ready to have some fun in the kitchen, and indulge in these irresistible bars today!