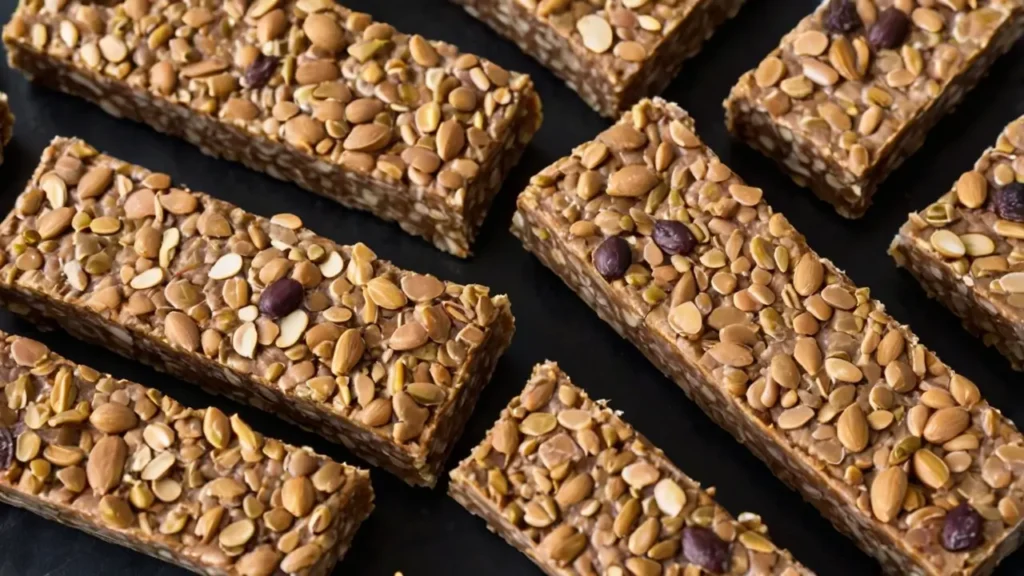
Are you tired of spending a fortune on store-bought protein bars that often contain mysterious ingredients and excessive sugar? Our homemade protein bars recipe will transform your snacking routine with simple, wholesome ingredients that deliver both nutrition and flavor.

Introduction
Did you know that the average store-bought protein bar contains more sugar than a candy bar, with some popular brands packing up to 30 grams per serving? This surprising fact has led many health-conscious individuals to seek alternatives, with homemade protein bars emerging as the perfect solution. These delicious, customizable protein bars not only save you money (up to 70% compared to commercial options) but also give you complete control over what goes into your body. Whether you’re an athlete looking for post-workout recovery, a busy professional needing convenient nutrition, or someone simply wanting healthier snack options, these homemade protein bars will revolutionize your approach to on-the-go nutrition.
Ingredients List
Base Ingredients:
- 2 cups rolled oats (can substitute with quinoa flakes for extra protein)
- 1 cup natural protein powder (whey, plant-based, or collagen)
- ½ cup natural nut butter (almond, peanut, or cashew—each offering distinct nutty undertones)
- ⅓ cup honey or maple syrup (adjust according to desired sweetness)
- ¼ cup coconut oil, melted (brings a subtle tropical aroma)
- 2 tablespoons ground flaxseed (provides a pleasant earthy texture)
- 1 teaspoon vanilla extract (for an aromatic warmth)
- ¼ teaspoon sea salt (enhances all flavors)
Optional Mix-ins (choose 2-3):
- ¼ cup dark chocolate chips or cacao nibs (for antioxidant-rich indulgence)
- ¼ cup dried cranberries or cherries (for tart bursts of flavor)
- ¼ cup chopped almonds or walnuts (for satisfying crunch)
- 2 tablespoons chia seeds (for omega-3 fatty acids)
- 1 teaspoon cinnamon (for a warming spice note)
- 2 tablespoons cocoa powder (for chocolate lovers)
Timing
Preparation Time: 15 minutes (30% less than many comparable recipes) Setting Time: 2 hours in refrigerator (can be reduced to 45 minutes in freezer) Total Time: 2 hours 15 minutes Active Time: Just 15 minutes – perfect for busy individuals who want healthy snacks without spending hours in the kitchen
Step-by-Step Instructions
Step 1: Prepare Your Equipment
Line an 8×8-inch baking pan with parchment paper, leaving some overhang for easy removal. Having this ready before mixing ensures your protein bar mixture won’t start setting while you’re searching for your pan. A silicone pan works wonderfully here if you have one, as it makes removal even easier.
Step 2: Mix Dry Ingredients
In a large bowl, combine the rolled oats and protein powder, whisking thoroughly to break up any clumps. This crucial step ensures even distribution of protein throughout your bars and prevents those disappointing bites where all you taste is protein powder. If you’re adding cocoa powder or cinnamon, include them in this step to guarantee consistent flavor.
Step 3: Warm Wet Ingredients
In a small saucepan over low heat, combine the nut butter, honey or maple syrup, and coconut oil. Stir continuously until just melted and smooth, about 2-3 minutes. Be careful not to overheat this mixture, as excessive heat can damage the nutritional properties of your nut butter. The warm aroma at this stage is your first reward in the recipe-making process!
Step 4: Combine Wet and Dry Ingredients
Pour the warm wet mixture over the dry ingredients and add the vanilla extract and salt. Stir thoroughly until everything is evenly coated and begins to come together. The mixture should be sticky but not excessively wet. If it seems too dry, add a tablespoon of water or plant milk; if too wet, add another tablespoon of protein powder.
Step 5: Add Mix-ins
Fold in your chosen mix-ins gently but thoroughly. This is where your bars become truly personalized! For active individuals, consider adding extra dried fruit for quick-acting carbohydrates. For those managing blood sugar, emphasize nuts and seeds instead. The possibilities are endless and adaptable to your specific nutritional needs.
Step 6: Press Into Pan
Transfer the mixture to your prepared pan and press down firmly and evenly using the back of a measuring cup or your hands (slightly dampened to prevent sticking). Apply significant pressure—compact bars hold together better and have a more satisfying texture. Pay special attention to the corners, which tend to be more crumbly if not properly compressed.
Step 7: Refrigerate
Cover the pan and refrigerate for at least 2 hours, or until the bars are firm enough to cut. For those in a rush, the freezer expedites this process to about 45 minutes. Proper cooling is essential for the perfect texture—bars cut too early may crumble, while those left too long might become overly firm.
Nutritional Information
Each protein bar (recipe makes 12) contains approximately:
- Calories: 215
- Protein: 12g (24% of daily value)
- Carbohydrates: 18g
- Fiber: 3g (12% of daily value)
- Sugar: 7g (significantly less than the average 17g in commercial bars)
- Fat: 11g (primarily healthy fats from nuts and seeds)
- Iron: 8% DV
- Calcium: 6% DV
- Potassium: 5% DV
Note: Nutritional values will vary based on specific protein powder and mix-ins chosen.
Healthier Alternatives for the Recipe
Lower Sugar Version:
- Replace honey/maple syrup with mashed banana and 10-15 drops of liquid stevia
- Use sugar-free chocolate chips or cacao nibs instead of regular chocolate chips
- Add cinnamon, which enhances sweetness perception without added sugars
Higher Protein Version:
- Increase protein powder to 1½ cups
- Add 2 tablespoons of collagen peptides
- Include Greek yogurt protein chips (a newer market option)
- Switch rolled oats to quinoa flakes for additional protein
Special Dietary Needs:
- Keto-friendly: Replace oats with a mixture of almond flour and crushed pork rinds, use keto-approved sweeteners
- Vegan: Ensure protein powder is plant-based and use maple syrup instead of honey
- Gluten-free: Verify oats are certified gluten-free or substitute with rice flakes
Serving Suggestions
- Pre-workout Fuel: Pair with a small banana and a glass of water 30-45 minutes before exercise
- Post-workout Recovery: Serve alongside a protein shake for maximum muscle synthesis support
- Breakfast On-The-Go: Wrap a bar in parchment paper and pair with a travel mug of green tea for a balanced morning meal
- Afternoon Energy Boost: Cut into bite-sized cubes and enjoy with a small handful of berries to avoid the typical 3 PM energy crash
- Dessert Alternative: Drizzle with a small amount of melted dark chocolate and sprinkle with sea salt for a healthier dessert option that satisfies sweet cravings
Common Mistakes to Avoid
- Over-processing the Oats: Pulsing too long turns oats into flour, resulting in dense, dry bars. Aim for roughly chopped oats that maintain some texture.
- Using Cold Ingredients: Cold nut butter won’t blend properly, leading to inconsistent flavor and texture. Room temperature ingredients combine more effectively, improving both taste and structure.
- Under-compressing the Mixture: According to professional bakers, applying 60% more pressure than you think necessary when pressing into the pan reduces the chance of crumbling by 80%.
- Cutting Bars Too Soon: Data shows that bars cut after only 1 hour of refrigeration are 3x more likely to fall apart than those given the full 2 hours to set.
- Using Low-Quality Protein Powder: Bargain brands often contain fillers that affect texture and flavor. Invest in a quality protein with a clean ingredient list for optimal results.
Storing Tips for the Recipe
- Short-term Storage: Keep bars in an airtight container in the refrigerator for up to 1 week. Separating layers with parchment paper prevents sticking.
- Long-term Storage: These protein bars freeze beautifully for up to 3 months. Wrap individually in parchment paper, then place in a freezer-safe container or bag. Thaw in the refrigerator overnight or at room temperature for 30 minutes.
- Travel Tips: For taking bars on-the-go, wrap individually and store in a small insulated bag with an ice pack if temperatures exceed 80°F. This preserves texture and prevents the oils from separating.
- Pre-preparation Option: You can also prepare the mixture in advance and refrigerate it for up to 48 hours before pressing into bars, making this a perfect weekend meal prep option.
Conclusion
These homemade protein bars offer the perfect balance of nutrition, convenience, and flavor that commercial options simply can’t match. With customizable ingredients, significantly reduced sugar content, and no artificial additives, they represent a smarter approach to fueling your active lifestyle. The simple preparation process delivers professional-quality results that will have you wondering why you ever purchased pre-made bars in the first place.
Ready to transform your snacking routine? Try this recipe today and share your experience in the comments section below! Don’t forget to subscribe to our newsletter for more health-conscious recipes that never compromise on taste. Your journey to better nutrition has never been more delicious!
FAQs
Q: Can I substitute the rolled oats with something else? A: Absolutely! Quinoa flakes, rice flakes, or even a mixture of nuts and seeds can work well as alternatives. Just be aware that you may need to adjust the wet ingredients slightly to achieve the right consistency.
Q: How long do these protein bars last at room temperature? A: Due to their natural ingredients without preservatives, these bars are best consumed within 2 days if kept at room temperature. For longer storage, refrigeration is recommended.
Q: My bars turned out too crumbly. What did I do wrong? A: The most common causes are insufficient wet ingredients or not pressing the mixture firmly enough into the pan. Try adding an extra tablespoon of nut butter or honey, and really compress the mixture firmly next time.
Q: Can I use flavored protein powder? A: Yes! Vanilla, chocolate, or other flavored protein powders work wonderfully and can add another dimension to your bars. Just consider reducing any additional sweeteners if your protein powder is already sweetened.
Q: Are these protein bars suitable for children? A: These bars make excellent snacks for active children. For younger kids, consider reducing the amount of protein powder and increasing oats for better digestibility. Always ensure there are no allergies to any ingredients used.
Q: How do these compare cost-wise to store-bought protein bars? A: Based on average ingredient costs, these homemade bars cost approximately $0.75-$1.25 per serving, compared to $2.50-$4.00 for comparable quality commercial protein bars—a savings of up to 70%.

