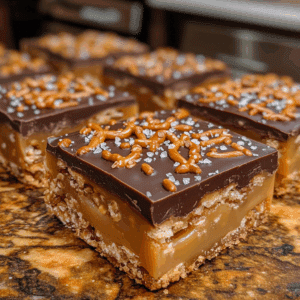
Hey there, fellow sweet-tooth enthusiasts! I have to tell you about a little gem I’ve been making on repeat: No Bake Avalanche Cookies. Seriously, I can’t get enough of these delightful treats! I first stumbled upon this recipe during a last-minute dessert emergency, and let me tell you, it’s been a game-changer ever since. I’ve made them for family gatherings, surprise visits from friends, and even just for a cozy night in. Trust me, each time I whip them up, they disappear in a flash!
Why You’ll Love This No Bake Avalanche Cookies
- Quick and Easy: No baking required! You can whip these up in no time, making them perfect for any occasion.
- Versatile: Feel free to customize the ingredients based on your cravings or what you have in your pantry!
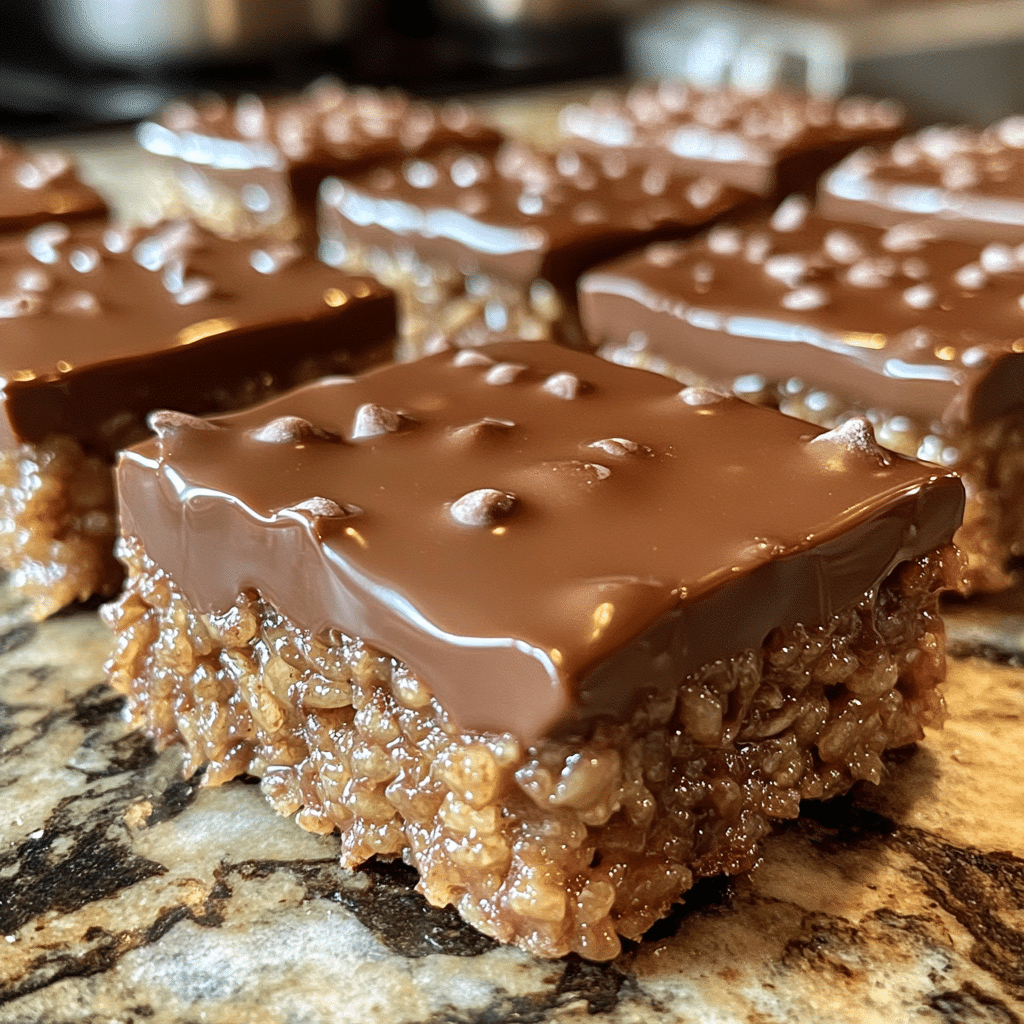
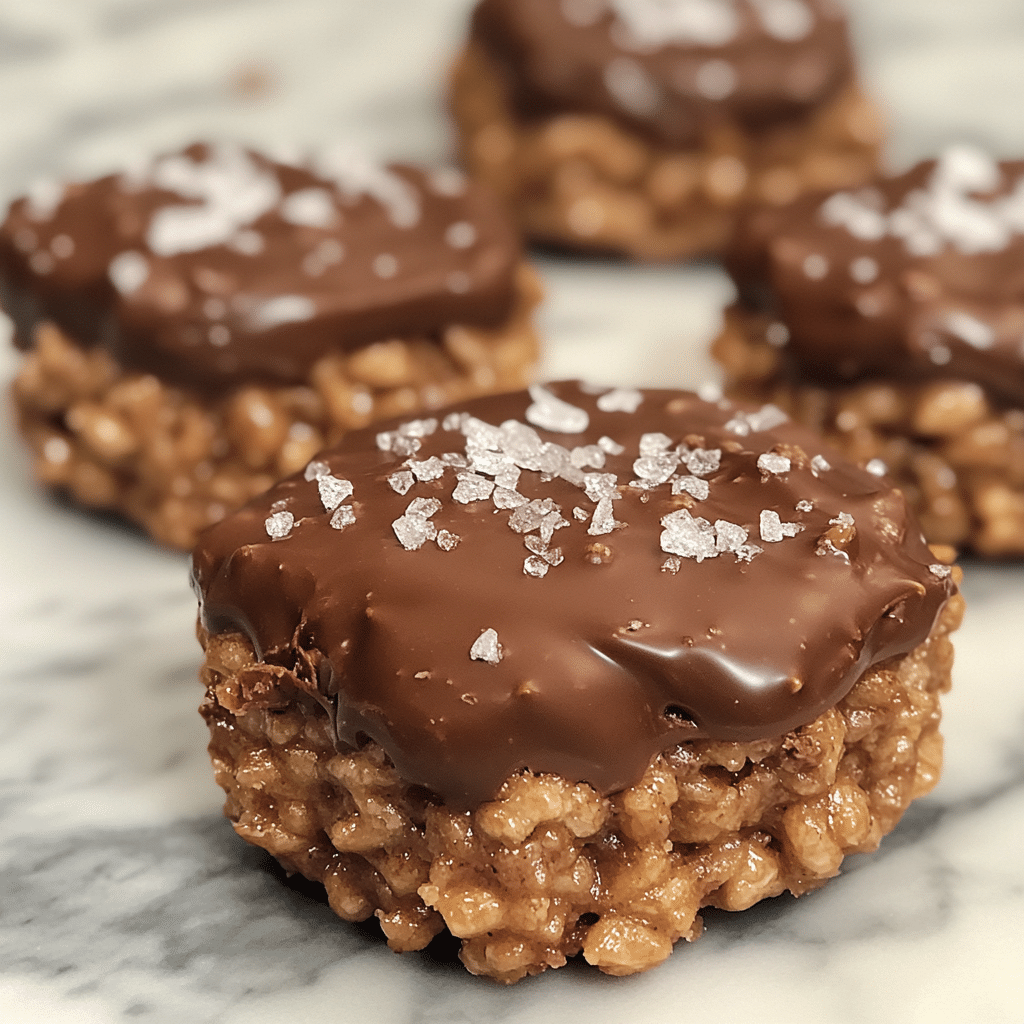
- Deliciously Indulgent: The combination of creamy peanut butter, rich chocolate, and crunchy cereal is simply irresistible.
- Visually Stunning: These cookies look as good as they taste, making them a hit for parties or gatherings.
- Make-Ahead Convenience: Prepare them in advance and keep them in the fridge for a sweet treat whenever you need a pick-me-up.
The Secret to Perfect No Bake Avalanche Cookies
The secret to perfect No Bake Avalanche Cookies lies in the quality of your ingredients and the technique of mixing. Using smooth, creamy peanut butter is crucial; it helps create that luscious texture that melts in your mouth. I’ve learned that gently folding the cereal into the peanut butter mixture prevents it from getting too soggy and maintains that delightful crunch. Trust me, it’s all about that balance! And if you follow my tips, you’ll be a pro at making these in no time!
Rave Reviews from Friends and Followers
“These No Bake Avalanche Cookies are a hit at every party! My friends can’t get enough, and I love how easy they are to make!” – Sarah J.
“I made these for a family gathering, and they were gone within minutes! Everyone kept asking for the recipe.” – Mike T.
“I’m not a great baker, but these cookies were so easy! They taste amazing and look beautiful on a plate.” – Emily R.
Creative Variations to Try
- Chocolate Chip Avalanche: Add mini chocolate chips for an extra chocolatey kick.
- Coconut Delight: Mix in sweetened shredded coconut for a tropical twist.
- Nutty Buddy: Toss in chopped nuts like almonds or walnuts for added crunch.
- Fruit Fusion: Add dried fruits like cranberries or raisins for a chewy surprise.
- Bonus: Drizzle melted chocolate on top before serving for a decadent finish!
FAQs – All Your Questions Answered!
Can I store these cookies?
Absolutely! Store them in an airtight container in the fridge for up to a week.
Can I substitute the peanut butter?
Yes! You can use almond butter or sunflower seed butter if you have nut allergies.
What if my mixture is too dry?
If your mixture feels too dry, add a splash of milk or more peanut butter to help it bind together.
How long do they need to set?
These cookies only need about 30 minutes in the fridge to set. But feel free to leave them longer for a firmer texture!
Storage/Serving Tips
- Keep in an airtight container to maintain freshness.
- For best results, store in the refrigerator.
- These cookies can also be frozen for up to three months!
- Serve chilled or at room temperature for the best taste experience.
Perfect Occasions for No Bake Avalanche Cookies
- Birthday parties – a guaranteed crowd-pleaser!
- Potluck gatherings – easy to transport and share.
- Movie nights – perfect for snacking while binge-watching your favorite series.
- Holiday celebrations – festive and fun!
- Quick dessert fix – when you need something sweet in a hurry.
The Complete Recipe
Thank you for sticking with me! Now, let’s dive into the recipe for these delightful No Bake Avalanche Cookies.
No Bake Avalanche Cookies
Ingredients
- 1 cup creamy peanut butter
- 1 cup chocolate chips (milk, dark, or semi-sweet)
- 3 cups crispy rice cereal
- 1/2 cup powdered sugar
- 1 teaspoon vanilla extract
Tip: Make sure to use fresh, high-quality peanut butter for the creamiest texture and best flavor. You can also substitute with almond butter or sunflower seed butter for a different twist!
Step-by-Step Instructions
Step 1: Melt the Chocolate
In a microwave-safe bowl, combine the chocolate chips and heat in 30-second intervals, stirring between each, until melted and smooth. This is where the magic starts, so don’t rush it!
Step 2: Mix the Peanut Butter and Sugar
In another bowl, mix the creamy peanut butter and powdered sugar until well combined. This mixture should be thick and creamy. If you’re feeling adventurous, mix in the vanilla extract now for an extra flavor boost.
Step 3: Combine the Mixtures
Once your chocolate is melted, pour it into the peanut butter mixture. Stir until everything is beautifully blended. You’ll want to take a moment to enjoy the smell of this decadent mix!
Step 4: Fold in the Cereal
Gently fold in the crispy rice cereal until completely coated. This step is crucial — make sure you get every piece of cereal covered in that delicious mixture!
Step 5: Shape the Cookies
Using a spoon or your hands, scoop out portions of the mixture and form them into cookie shapes. Place them on a parchment-lined baking sheet. They don’t need to be perfect; the rustic look adds to their charm!
Step 6: Chill and Serve
Refrigerate the cookies for at least 30 minutes to let them set. Once they’re firm, dig in and enjoy your delicious creations!
Nutrition Info (per cookie): Approximately 150 calories, 8g fat, 15g carbs, and 3g protein. Keep in mind that these are estimates and can vary based on specific ingredients used.
Final Thoughts
I can’t express enough how special these No Bake Avalanche Cookies are — they’re more than just a treat; they’re a memory waiting to happen! Whether you’re celebrating a special occasion or just in need of a quick dessert fix, these cookies are sure to impress. So, what are you waiting for? Get in the kitchen and start whipping up these delightful sweets. I promise you won’t regret it!